Mfr Part # ABX00087
ARDUINO UNO R4 WIFI
Arduino
License: General Public License Arduino
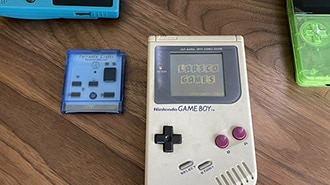
Building electronics projects is a great way to learn hardware and software development, but projects become even more rewarding when they are fun to use. In this project, we'll build a handheld Arduino-based game console capable of running ten classic arcade-inspired games on a compact OLED display. The console combines simple hardware with modular firmware, creating a portable gaming platform that can be expanded with new games and features.
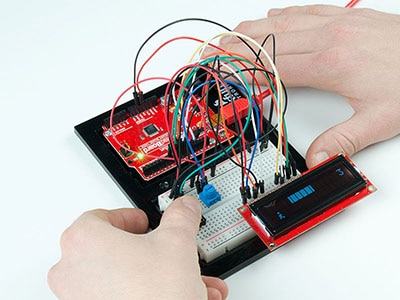
The project is designed around an Arduino UNO R4 WiFi, a monochrome OLED display, tactile buttons, and a small rechargeable battery. The result is a pocket-sized gaming device that demonstrates display interfacing, user input handling, embedded graphics, audio generation, power management, and software architecture in a single build.
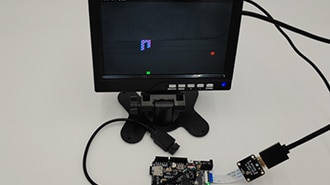
The console uses a 128 × 64 pixel SSD1306 OLED display to render graphics and menus. Four pushbuttons provide directional controls and menu navigation, while a piezo buzzer generates sound effects during gameplay.
When powered on, the system displays a startup screen followed by a game selection menu. Players can scroll through the available games using the buttons and launch a title directly from the menu. After a game ends, the system automatically returns to the selection screen, allowing another game to be loaded without restarting the device.
The firmware is organized using a modular structure where each game is stored in a separate source file. This approach simplifies maintenance and makes it easy to add new games later.
This handheld console includes:
Ten arcade-inspired games
Portable battery-powered operation
OLED graphical display
Simple four-button control scheme
Sound effects through an onboard buzzer
Modular firmware architecture
Compact handheld form factor
The included games are inspired by popular retro arcade titles such as Snake, Pong, Breakout, Tetris, Space Invaders, Flappy Bird, Pac-Man, Asteroids, Dino Run, and Maze Runner. Each game has been optimized to run within the memory and processing limitations of the Arduino platform.
The console is built using readily available components:
Hookup wire and headers
A small perfboard serves as a custom expansion board that mounts directly onto the Arduino. This arrangement keeps wiring organized and creates a more robust handheld device compared to a breadboard-based prototype.
The OLED communicates with the Arduino using the I²C interface. Only two signal lines are required:
SDA for data
SCL for clock
This minimizes wiring complexity while providing sufficient performance for menu rendering and simple game graphics.
The display is responsible for:
Startup screens
Game selection menus
Gameplay graphics
Score displays
Status information
Four pushbuttons provide all user interaction.
The buttons are used for:
Menu navigation
Character movement
Directional control
Game actions
Since mechanical switches naturally produce contact bounce when pressed, software debouncing is implemented to ensure reliable input detection and prevent unintended multiple button presses.
A buzzer connected to a digital output pin provides audio feedback throughout the system.
Sound effects are used for:
Menu selection
Game events
Player actions
Startup notifications
Game-over sequences
Although simple, these audio cues significantly improve the overall user experience.
To make the console truly handheld, the system is powered by a single-cell LiPo battery.
Because the Arduino requires a stable 5 V supply, a boost converter raises the battery voltage to the required operating level. A slide switch is included to disconnect power when the console is not in use.
When working with LiPo batteries, always verify wiring carefully and insulate exposed connections to prevent accidental shorts.
One of the most valuable aspects of this project is its software structure.
Rather than placing all code in a single file, each game is implemented as an independent module. The main program acts as a launcher that handles:
Display initialization
Button management
Menu navigation
Game selection
Audio functions
This architecture offers several benefits:
Easier debugging
Improved code organization
Simpler feature additions
Better scalability
Developers can create entirely new games without modifying the core system logic.
Several development challenges emerged during the project.
Display Library Compatibility
Early testing revealed compatibility issues with certain graphics libraries. Switching to the U8g2 graphics library provided reliable OLED operation and improved rendering performance.
Button Bounce
Mechanical button bounce caused inconsistent menu navigation and gameplay input. A software debounce routine was added to filter false transitions and ensure dependable control.
Resource Constraints
Running graphical games on a microcontroller requires careful memory management. The firmware was optimized to fit within available resources while maintaining smooth gameplay.
This project combines several important embedded systems concepts:
Microcontroller programming
OLED display interfacing
I²C communication
User interface design
Digital input processing
Audio generation
Battery-powered design
Modular software development
Because the project integrates hardware and software in a practical application, it serves as an excellent learning platform for makers, students, and engineers looking to expand their embedded development skills.
After completing the base design, there are many expansion opportunities:
Save high scores in nonvolatile memory
Add additional games
Implement difficulty settings
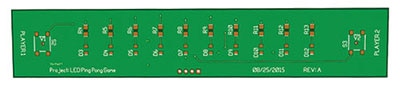
Design a custom PCB
Create a 3D-printed enclosure
Add wireless multiplayer features
Upgrade to a larger display
Improve battery life through power optimisation
This handheld Arduino game console demonstrates how a relatively simple collection of components can be transformed into a portable entertainment device. Beyond the nostalgia of retro-style games, the project provides hands-on experience with embedded graphics, user input handling, modular firmware design, and portable power systems.
Whether you're exploring embedded development for the first time or looking for a fun weekend build, this project offers an engaging way to develop practical electronics and programming skills while creating a device you can actually enjoy using.